To create a vSphere Host Group, you must first setup a VMware vSphere Cloud Credentials.
To securely connect Nirmata to a vSphere in your Private Cloud or Data Center, first setup a Private Cloud.
Setting up VMware consists of the following steps:
Setup a Resource Pool in vCenter
Refer to VMWare vSphere documentation for instructions on setting up a Resource Pool.
Create a vSphere Template
Create and launch a Linux VM using vSphere. Connect to the VM and setup Nirmata agent by running the following command:
`sudo curl -sSL https://www.nirmata.io/nirmata-host-agent/setup-nirmata-agent.sh | sudo sh -s -- --cloud vsphere`
Now you can create a template for the VM using vCenter. This template should be selected when creating a host group for your vSphere provider.
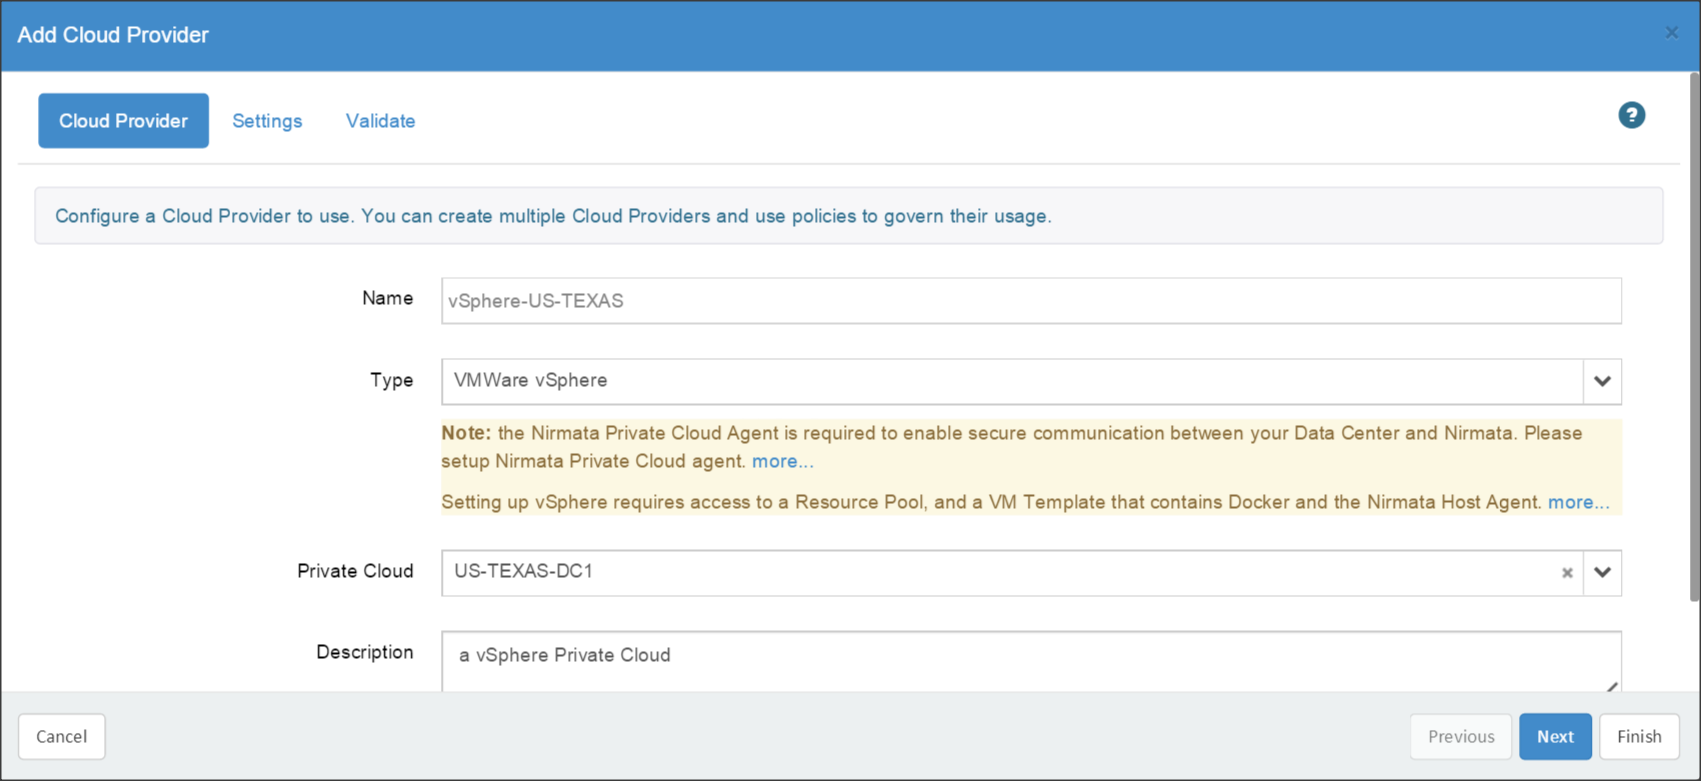
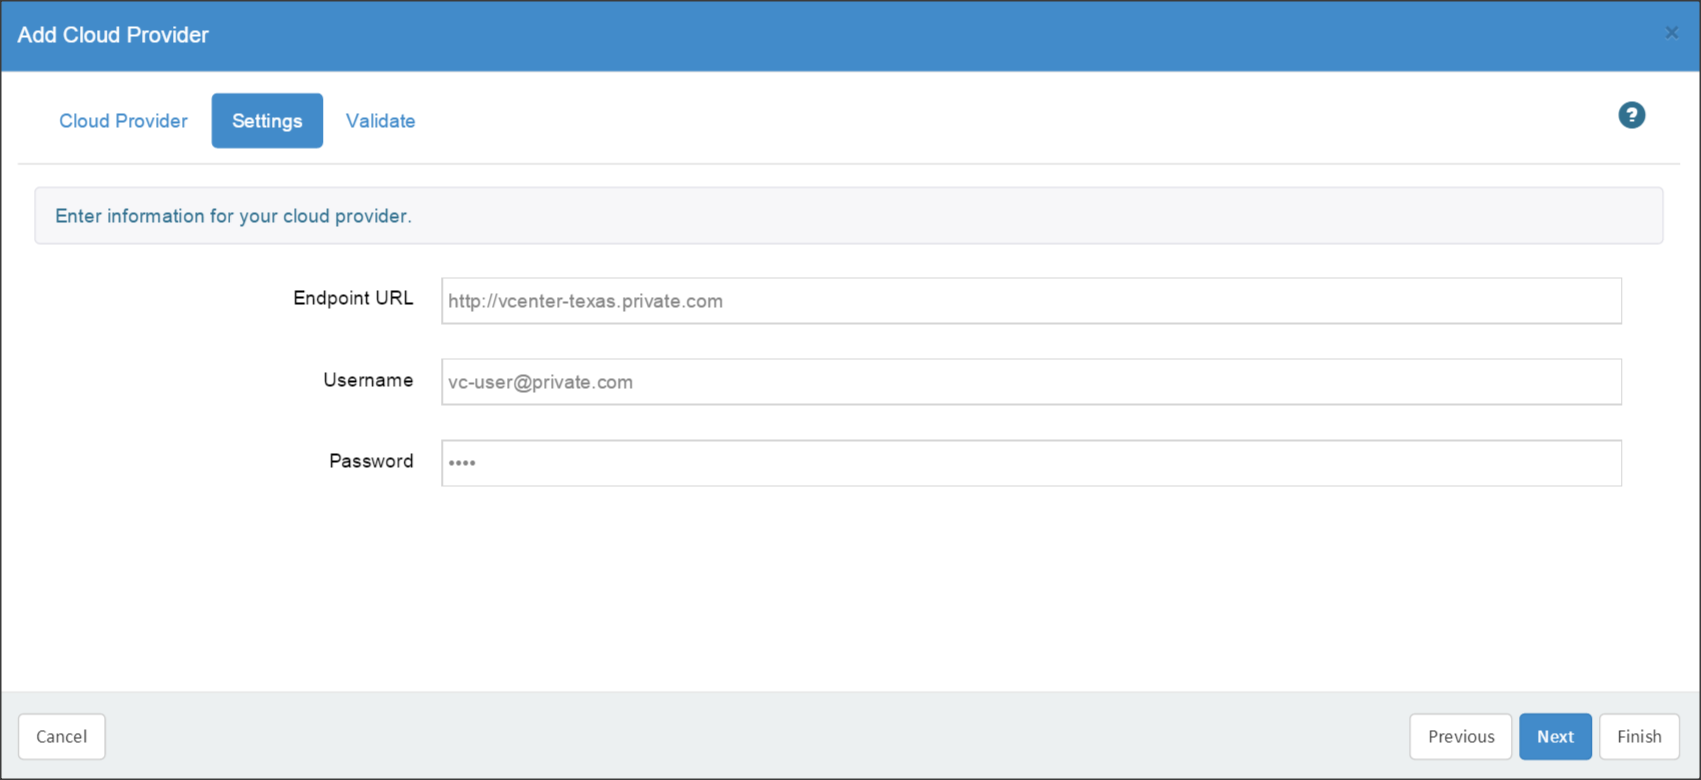
Create a VMware vSphere Cloud Provider
Create a VMWare vSphere provider by providing the vCenter SDK URL (https://serveraddress/sdk) and credentials:
After entering the credentials, validate access to your cloud provider before closing the wizard:
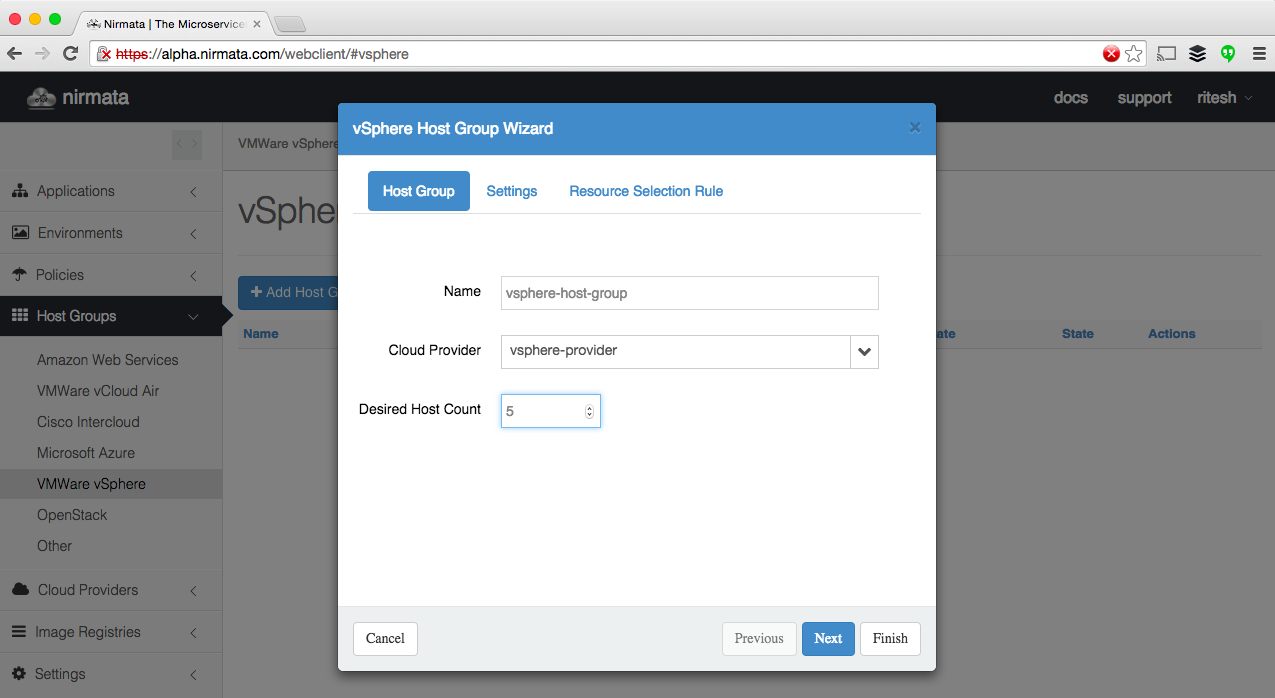
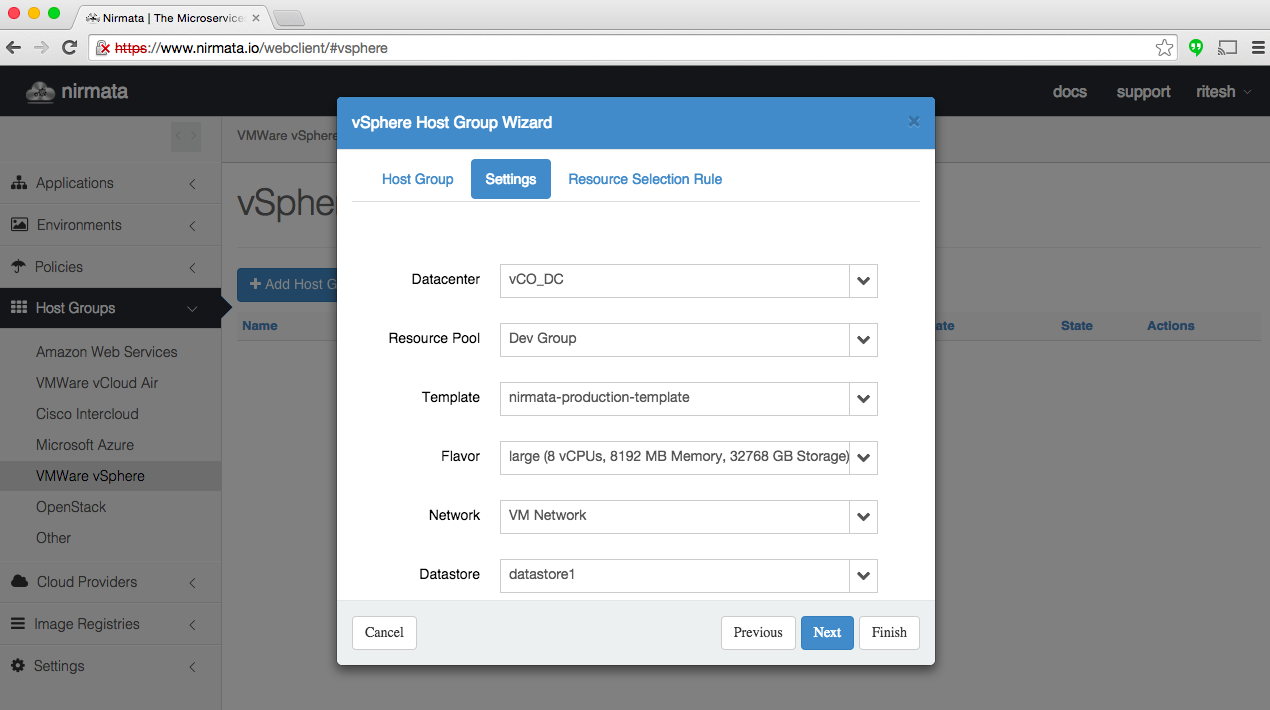
Create a VMware vSphere Host Group
Next, you can create a host group by selecting the vSphere provider, specifying the number of desired hosts, providing the data center information and selecting the resource pool, image template, flavor, network and datastore.
Once this is done, Nirmata will create and setup VMs. Once the VMs are powered on, they will connect to Nirmata SaaS. Now you can create applications and deploy them to your VMWare vSphere resources.