Introduction
VMware vSphere streamlines virtual machine and virtual environment management. When applied to a Kubernetes cluster running a MySQL-Wordpress application, updates, revisions, and general management is faster and more accessible.
Nirmata allows users to bring together each of these services to configure and control behavior in one location.
Prerequisites
Before starting, ensure that the following is available:
- Three (3) VM’s with 2vCPUs, 16GB memory, and 300GB storage accessible from the Internet.
- Access to the load-balancer and firewall.
Setup VMware vSphere
First, setup VMware vSphere and configure it to allow for a Nirmata-managed Kubernetes cluster.
After configuring the resource pool, setup a VM template.
How to Setup a VM Template
To setup a VM Template, run the update and install commands.
Update and Install Commands:
yum update --skip-broken -y
yum install net-tools
Next, install Docker and the Nirmata agent using the Install Docker and Nirmata Agent command.
Note: Remove the file: /opt/nirmata/conf/host_agent.id and the directory: /opt/nirmata/db/prior to saving the VM as a template.
/etc/sysconfig/network-scripts/ifcfg-*nameofmaininterface* and remove the UUID
The configuration line should look like - UUID=""
Install Docker and Nirmata Agent Command (Docker.sh):
#!/bin/bash -x
# Install Docker
sudo yum update -y

sudo tee /etc/yum.repos.d/docker.repo <<-'EOF'
[dockerrepo]
name=Docker Repository
baseurl=https://yum.dockerproject.org/repo/main/centos/7/
enabled=1
gpgcheck=1
gpgkey=https://yum.dockerproject.org/gpg
EOF

sudo mount -o remount,rw '/sys/fs/cgroup'
sudo ln -s /sys/fs/cgroup/cpu,cpuacct /sys/fs/cgroup/cpuacct,cpu

sudo yum install -y docker-engine
sudo systemctl enable docker.service
sudo systemctl start docker
After installing Docker and the Nirmata agent, run the clean-up command.
Clean Up Command (cleanup.sh):
# Stop and remove any running containers
sudo docker stop $(sudo docker ps | grep "flannel" | gawk '{print $1}')
sudo docker stop $(sudo docker ps | grep "nirmata" | gawk '{print $1}')

sudo docker stop $(sudo docker ps | grep "kube" | gawk '{print $1}')
sudo docker rm  $(sudo docker ps -a | grep "Exit" |gawk '{print $1}')

# Remove any cni plugins
sudo rm -rf /etc/cni/*
sudo rm -rf /opt/cni/*

# Clear IP Tables
sudo iptables --flush
sudo iptables -tnat --flush

# Restart docker
sudo systemctl stop docker
sudo systemctl start docker
sudo docker ps

# Deletes the cni interface
sudo ifconfig cni0 down
sudo brctl delbr cni0
sudo ifconfig flannel.1 down
sudo ip link delete cni0
sudo ip link delete flannel.1

# Remove cluster database
sudo rm -rf /data
If running on CentOS or RHEL, disable SE Linux and setup ip tables.
To setup IP tables, edit /etc/selinux/config.
Set SELINUX=disabled
After completing the edits, shutdown and reboot.
Using a SE Status command, confirm that SELinux is disabled.
SE Status Command:
sestatus
Configure the IP Tables on the VM template node with the VM Template IP Tables commands.
VM Template IP Tables Commands:
sudo iptables --policy INPUT ACCEPT
sudo iptables --policy OUTPUT ACCEPT
sudo iptables --policy FORWARD ACCEPT
sudo iptables -Z
sudo iptables -F
sudo iptables -X
After creating a VMware vSphere template, setup a vSphere account and provide access to the Resource Pool and VM template for Nirmata to use.
VMware vSphere in Nirmata
After setting up VMware vSphere, the next step is to setup vSphere inside Nirmata.
How to Setup VMware vSphere in Nirmata
Setup a vSphere Cloud Provider. Click here for instructions.
Then setup a vSphere Host Group. Click here for instructions.
After setting up the Host Group, setup the Nodes and Load-Balancer in a High-Availability configuration. Click here for instructions.
Then configure the Storage Class for the vSphere Cluster Types. Click here for instructions on creating a Cluster Type.
Next, create a Storage Class for the vSphere Cluster Type
Use the following template to create the Storage Class for the vSphere Cluster Type.
Storage Class for the vSphere Cluster Type Template:
metadata:
  name: filesystem
  selfLink: /apis/storage.k8s.io/v1/storageclasses/filesystem
  labels:
    nirmata.io/storageclass.name: filesystem
provisioner: kubernetes.io/vsphere-volume
apiVersion: storage.k8s.io/v1
reclaimPolicy: Retain
kind: StorageClass
parameters:
  diskformat: thin
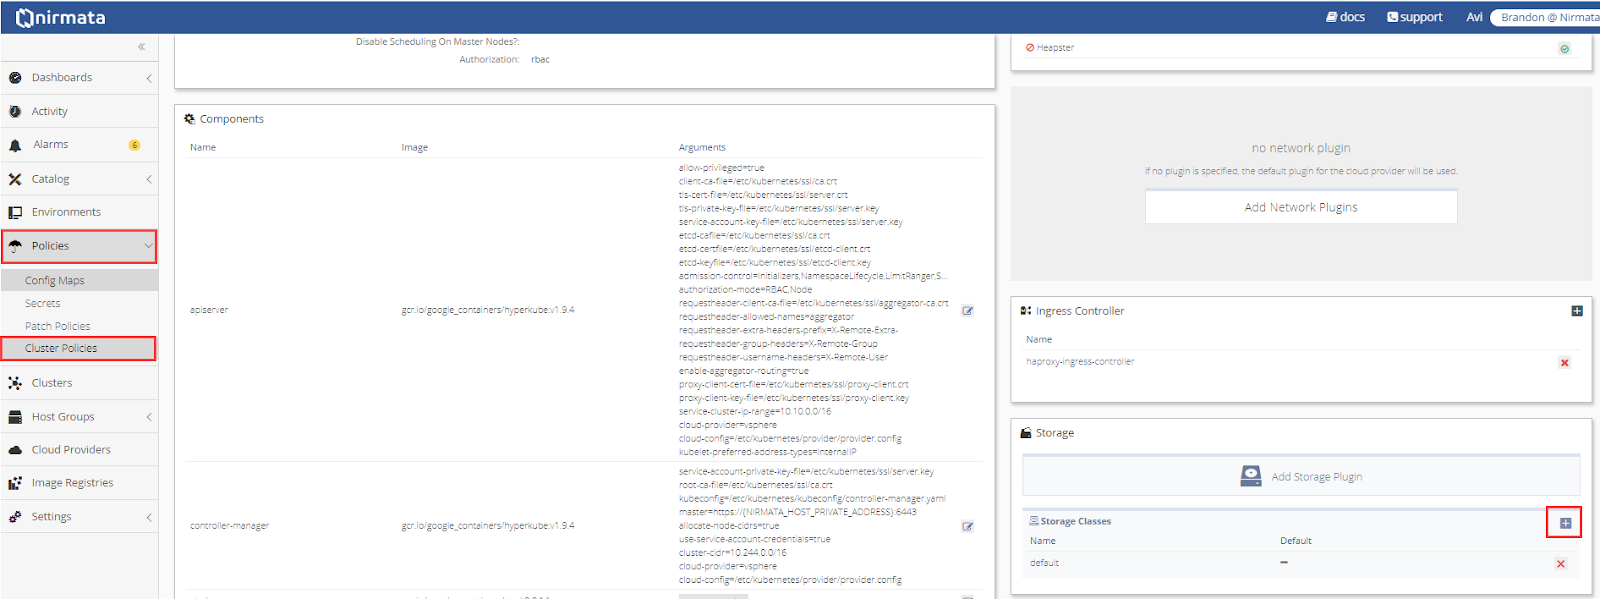
To add the Storage Class to the vSphere Cluster Type, select Policies and then Cluster Types from the sidebar menu.
Open the vSphere Cluster Type and scroll to the Storage Class section.
Click the + icon to add a new Storage Class.
Drop the vSphere Cluster Type Storage Class YAML file into the upload box or select the file from the directory.
Configure Kubernetes Cluster on vSphere
The final step is to configure the Kubernetes Cluster on VMware vSphere.
Click here for instructions on creating a new Kubernetes Cluster in Nirmata.